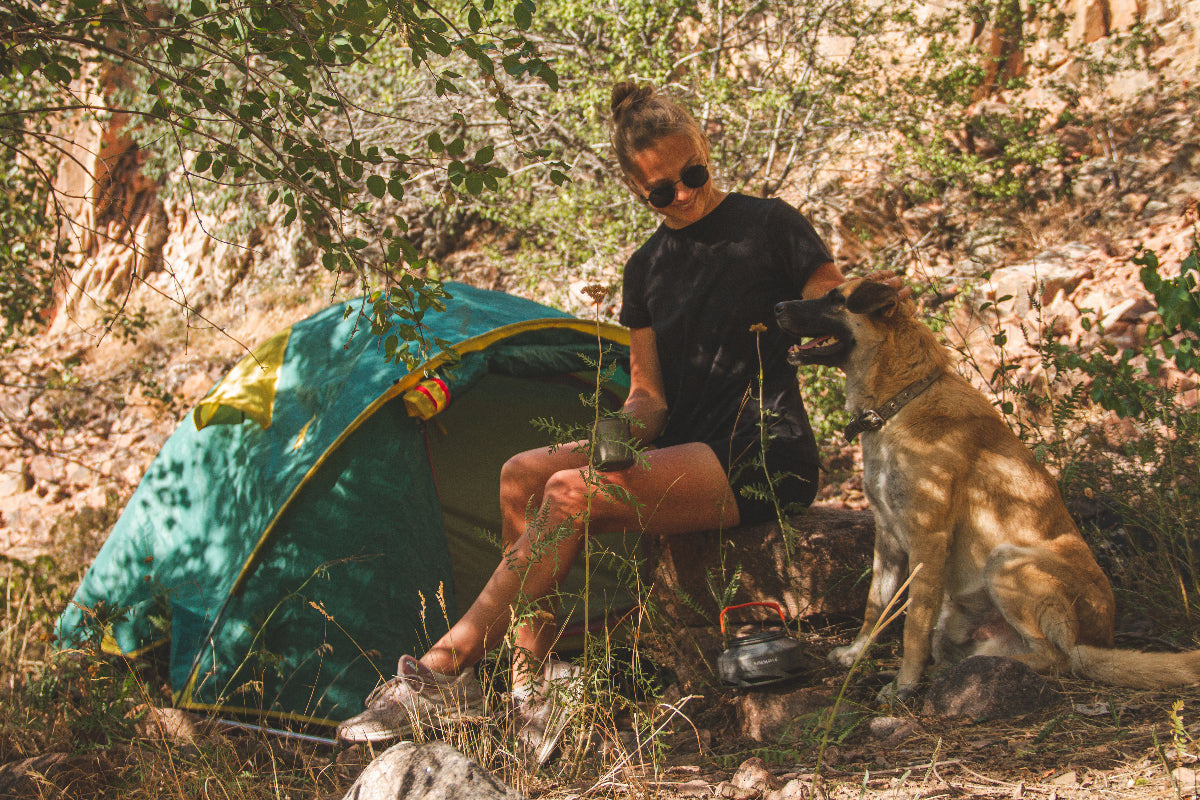
It's a common predicament: you've emerged from your tent greeted by the vast expanse of the great outdoors, your stomach growls, yet the thought of a complex meal preparation seems daunting.
Enter the trusty camping stove, your ticket to a wide range of camping breakfast ideas that are both simple to whip up and satisfying to the last bite.
With the Fire Maple range at your disposal, gone are the days of mundane morning meals. Let's explore how a delicious breakfast, paired with the efficiency of Fire Maple's gear, can transform your campsite into a kitchen and energize your outdoor endeavors.
Whether you're a culinary novice or a seasoned chef under the stars, this post will guide you through crafting breakfasts that are as flavorful as they are nourishing, all with the ease that every adventurer seeks as they start their day.
As you plan your next wild camping trip, thoughts of the ultimate breakfast that's both fuss-free and fulfilling should be on your menu. With the right equipment and a bit of pre-trip prep, you can turn the most important meal of the day into a highlight of your outdoor experience.
These top 9 easy camping breakfast ideas are designed to maximize flavor while minimizing effort, ensuring that you spend less time cooking and more time enjoying the breathtaking views that morning in the wild has to offer.
So, grab your camping gas stove and get ready to dive into a list that will make your mornings in nature as invigorating as the adventures that lie ahead.
In a cast iron skillet, mix eggs, diced bell peppers, onions, and a handful of cheese. Cook on a gas camping stove or over an open flame. Add in some cooked bacon or breakfast sausage for extra flavor. Serve with fresh apples or berries for a balanced meal.
I'm particularly fond of recipes that wrap everything into a neat, easy-to-handle package that you can eat on the go, which is why this is a favorite recipe of mine.
Wrap scrambled eggs, cheddar cheese, breakfast sausage, and diced bell peppers in a warm tortilla. Add some hot sauce for a kick. These breakfast burritos are not only a delicious breakfast but also easy to hold, making them ideal for those early mornings in the great outdoors.
Start by sizzling diced potatoes and onions on a frying pan, over your stove or campfire, achieving that perfect crispy texture. The feast frypan is the perfect choice for this task. As they cook, add cherry tomatoes for a burst of flavor. Then, create small wells in the hash to crack a few eggs directly into the pan.
Sprinkle generously with cheddar cheese, allowing it to melt into the hash. This hearty, savory breakfast cooked to perfection on a portable stove will keep your energy levels high for any outdoor adventure.
Before you hit the hay, mix oats with your favorite yogurt, a bit of dry mix for sweetness, and some chia seeds. Let it sit overnight, and in the morning, top it with fresh berries. It’s an easy camping breakfast that’s ready when you wake up for those mornings when you just don't feel like cooking!
If you're looking for more camping breakfast ideas that don't involve cooking, then this is another great option for a quick breakfast or snack, homemade granola bars with oats, honey, dried fruit, and nuts are perfect. They’re easy to make ahead of your camping trip and are both kid-friendly and satisfying for the whole family.
Mash ripe bananas and mix them into your pancake batter for a sweet, nutritious twist. Cook the pancakes on a griddle or skillet over your camp stove. These pancakes have the comforting flavor of banana bread and are even more delectable when topped with a dollop of nut butter or a sprinkle of chopped nuts.
Dip strips of bread in a sweet egg mixture with a touch of cinnamon, vanilla and brown sugar then fry in a pan over a camp stove, such as the Polaris remote gas stove. Serve with a generous drizzle of maple syrup and a side of fresh fruit for a classic breakfast that satisfies any sweet tooth. It's a super easy recipe and kid friendly classic making this an ideal camping breakfast for all the family.
For an easy peasy one pan breakfast, beat eggs then pour them into a hot frying pan with cheese, diced bell peppers, and chopped onions, and cook over an open flame. Top with a sprinkle of herbs and serve with some bacon and a side of hash browns for a classic breakfast experience.
For anyone who loves a sweet breakfast, you must try these on your next camping trip!
Nestle pre-made cinnamon roll dough into a skillet and cook it over hot coals or a gas stove. Watch as the cinnamon rolls puff up and turn golden brown, filling the air with their irresistible aroma. Once they're cooked through, drizzle them with icing for a gooey, delightful treat that pairs wonderfully with your morning coffee.
Beat fresh eggs and pour them into a hot skillet over your campfire. Stir continuously for fluffy, soft scrambled eggs. Add cheese, diced vegetables, or pre-cooked breakfast meats for added flavor and nutrition. This simple dish is a versatile and protein-packed way to start your day.
Cook bacon until crispy and eggs to your liking (fried egg or scrambled egg) on a skillet. Layer them on a toasted English muffin or bagel, topped with slices of creamy avocado. This sandwich is a filling, balanced meal that’s easy to eat with your hands while enjoying the morning views.
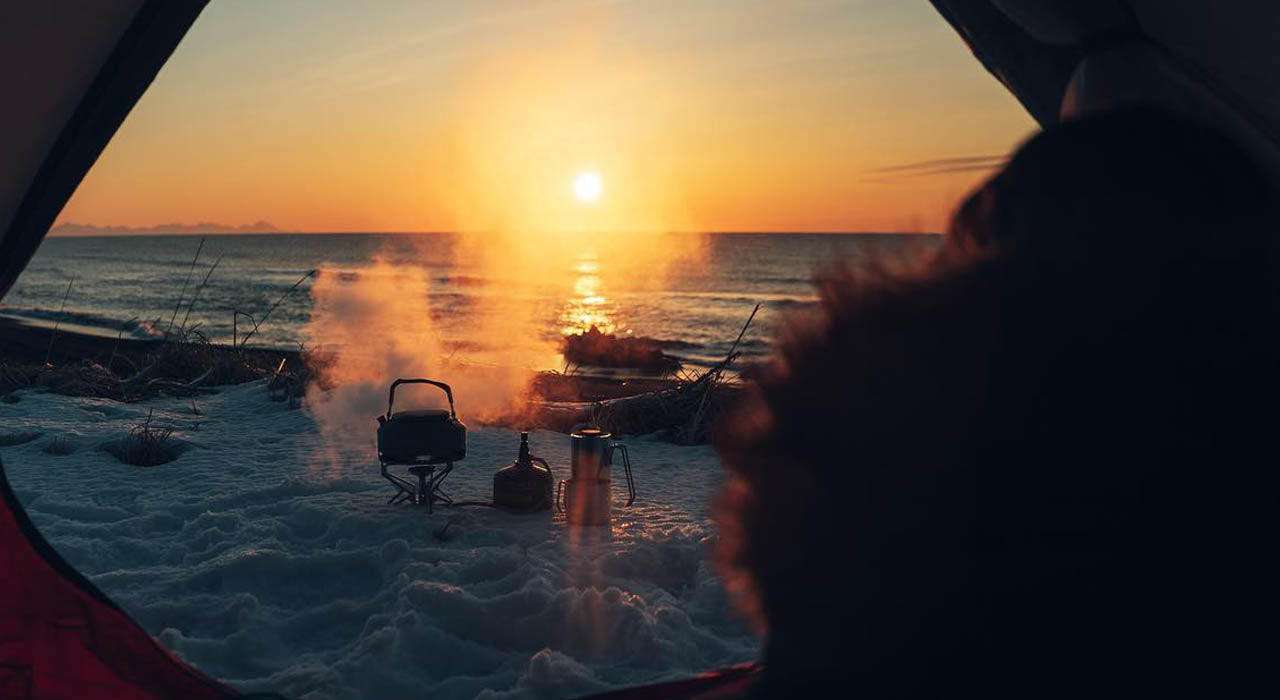
If you're anything like me, you're never fully awake until a hot mug of freshly brewed coffee is cradled in your hands, complementing the heartiness of a great camping breakfast.
It's the perfect combination to kick-start the day!
Whether you prefer the rich, smooth taste of a french press or the quick convenience of a pour-over, the right brewing gear is out there to complement your outdoor culinary experience.
For minimalist backpackers, like myself, a simple foldable coffee filter offers an effortless way to enjoy filtered coffee. Just pour hot water over your grounds for a delicious brew that doesn't weigh down your pack.
The ease and convenience of pour-over coffee is unmatched, especially when you're on the trail. It’s a fuss-free method that still delivers a rich, flavorful cup, proving that you don’t need to compromise on quality for simplicity when you’re surrounded by nature.
At the end of the day, there are numerous ways to enjoy a great cup of coffee outdoors.
No matter your brewing style, you’ll find a coffee device in Fire Maples range that promises to enhance your camping breakfast with the perfect cup of coffee, tailored just to your liking.
About the Author: Steve Cleverdon
Steve is an adventurous outdoor blogger who feels most alive atop a mountain or sleeping beneath a starry sky. On his blog, Steve shares practical gear reviews and insightful guides, encouraging others to embrace the wild and explore the great outdoors. Follow him on Instagram.
]]>Alex: Absolutely. At its core, motocamping presents unique challenges and rewards. Traditional camping allows you to pack more, but with motocamping, every inch of space counts. This isn’t just camping; it's about skillfully integrating your journey and destination. Whereas a traditional camper might arrive at a site, set up, and relax, a motocamper’s journey begins with meticulous planning, mindful of weight distribution, and gear essentials.
Q: Tell us about one of your most memorable encounters on the road?Alex: Oh, where to begin! Once, riding through Colorado, I chanced upon a fellow motor camper named Rosa. We struck up a conversation and found out we both planned to camp near the same lake that night. As luck would have it, Rosa was a seasoned camp chef and introduced me to some of the most delightful campfire dishes I'd ever tasted! We shared stories, food, and laughter under the stars. It’s moments like these, where you find camaraderie in the most unexpected places, that make motocamping so special.
Q: As a beginner, what are some foundational principles of motocamping?Alex: First, safety always comes first. This applies both to your motorcycle journey and your camping setup. Invest in quality protective gear. Second, become intimate with your bike – understand its capabilities and limits. Lastly, start small. Your backyard can be your first campsite. Learn your gear, experiment with packing, and get a feel before hitting long routes.
Q: Mentioning routes, any beginner-friendly paths and their quirks?Alex: The Pacific Coast Highway is beginner-friendly because it’s well-traversed and offers plenty of scenic campsites. But always watch for coastal winds. The Dragon at Deals Gap is thrilling, but I'd advise it for more experienced riders due to its sharp turns. Bear tooth Pass in Montana is breathtaking but prepare for sudden weather shifts. For those wanting a mix of terrains, the Blue Ridge Parkway is fantastic. It offers varied elevations, challenging curves, and abundant campsites. Always remember to research the specifics of any route beforehand.
Q: Riding through different terrains surely means facing varied weather conditions. How do you prepare?Alex: Absolutely right. You must be ready for sudden weather changes. Waterproof gear is a must. I also carry a compact rain cover for my backpack and bike seat. In colder regions, layering is crucial. It’s also wise to have a weather app that works offline, so you’re always informed. If the forecast predicts severe conditions, it’s best to halt and seek shelter. No journey is worth risking your safety.
Q: Tips on choosing and setting up a campsite?Alex: Choosing the right site is as much about safety as it is about the view. Always look for elevated grounds, so you don’t wake up in a puddle if it rains. Ensure you're a fair distance from any water bodies, both for safety and to avoid mosquitoes. Before setting up, clear the ground of sharp objects to protect your tent. Always have a dry bag to keep critical items, like your electronics and documents. If possible, align the tent entrance away from prevailing winds for extra warmth.
Q: Beyond tents and sleeping bags, what are some overlooked essentials?Alex: An often-overlooked aspect is a motorcycle repair kit tailored to your specific bike model. Then, a compact first aid kit can be a lifesaver. Given that we’re limited in space, multipurpose tools are golden. Also, for those who cherish a warm meal or coffee, a compact and efficient cooking system, like the Product X, is indispensable. Its quick setup and reliable heating mechanism have often been my solace after a tiring ride.
Q: Can you share a motocamping hardship and how you overcame it?Alex: Once, in Utah, I faced a flat tire with no repair shop in sight. With limited tools and dwindling daylight, it became a race against time. But I had studied basic tire repair techniques. It wasn’t perfect, but the patch job held until I reached a nearby town. The lesson? Always be prepared and never underestimate the value of knowledge.
Q: Motocamping must require some dietary planning. How do you manage meals on the road?Alex: It surely does! Space is limited, so planning is crucial. Dehydrated meals are fantastic – lightweight, space-saving, and with a good variety. They are especially handy when you’re camping in remote areas. For breakfast, I rely on instant oatmeal packs. They're filling, and all you need is hot water. Talking about water, always have a portable water purifier. Many times, I've had to source water from streams. And when I'm in the mood for a hearty meal, Fire-Maple X2 cooking system is a boon. It’s efficient and compact, making it perfect for motocamping. From brewing a quick coffee to whipping up pasta, it has never let me down.
Alex's tales and insights showcase the multifaceted world of motocamping. It's not just about the thrill of riding or the serenity of camping but the harmonious blend of both. With the right gear, preparation, and spirit, motocamping can be an unparalleled experience.
]]>Personally, for me, tea is one of the main drinks in both mountain hiking and in everyday life, and I live in the mountains if you haven't forgotten. Therefore, I don't just have to, but I must be able to brew proper, tasty, and most importantly healthy tea, with the addition of herbs that I collect my own hands in our Yangiabad mountains, in an environmentally friendly area. And here are the TOP teas that I drink myself and brew for my clients on trips.
1) Black, large-leaf tea with thyme is a classic camping tea, especially if boiling water at a campfire, dry archi on firewood, exquisite aroma and taste. Tea with thyme warms you well in winter and cools you down quickly in summer. Personally, I like to add a little sugar, which further tones me when I hike. But the most important thing is not to exaggerate, as thyme raises blood pressure!
2) Black tea with soul - incomparable aroma and pleasant taste! Most often, I brew this tea at night by the campfire, as tea with soul calms the nervous system, which is ideal after a long hike, before going to bed, and the crack and smell of campfire will complete such a romantic atmosphere. It is also worth to remember that there is a very useful element in your soul called "Selenium"!
3) Well, and the third on my list is Karkade Tea with thyme, lemon, dried apples, pink pepper and sugar. This tea cannot be described, it needs to be tried))) Insanely pleasant taste that lingers in your memory for a long time. Consume this drink in a chilled form is preferably for a deeper understanding of the bouquet. You can also pour it into a bottle, cool it in the river and drink while you along the route.
There actually are many different combinations of herbs and teas, my list is only a small part of the huge culture called Tea. The herbs I use have anti-inflammatory, toning, sedative, healing properties, the main thing is to be able to use them competently, avoiding negligence and bigotry. And helps me in all this is the high-quality equipment from @firemaple_gear that makes making tea or food even more exciting and insanely convenient! If you use it, only the best!
I remember years ago, standing beside a frozen fishing hole with layer upon layer of clothes, dreaming of a hot meal. There was something oddly poetic yet excruciatingly impractical about being a chef in a winter wonderland, far from the warmth and convenience of my kitchen. But let me tell you, times have changed. Meet the Sunflower Stove—a game-changer that has transformed my winter fishing expeditions from a test of endurance to a culinary escapade.
Before we dive into my favorite al fresco fish recipes, let's talk about the real star of the show: the Sunflower Stove's heating capabilities. Its state-of-the-art infrared technology has turned my makeshift winter camp into a cozy sanctuary. The freezing air and biting winds don't stand a chance.
When you’ve fought the elements and finally landed that perfect trout or catfish, the last thing you want to do is wait. That's the beauty of the Sunflower Stove. Its multi-functionality lets you swap between a heating device and a high-performance cooking stove effortlessly.
I need to mention this upfront: The Sunflower Stove is designed exclusively for outdoor use. So it's perfect for those of us who love the thrill of the catch and the joy of outdoor cooking.
Ingredients:
Instructions:
Ingredients:
Instructions:
The Sunflower Stove has utterly revolutionized my winter fishing adventures. No longer do I dread the icy winds or the cumbersome clothing. With this nifty stove by my side, I'm not just a fisherman or a chef—I’m both. I cook what I catch when I catch it, turning each fishing outing into a rustic gourmet experience.
So, who's ready to join me for the next winter fishing trip? With the Sunflower Stove in tow, we're not just surviving the elements, we're thriving in them. Let’s pack our fishing gear, sharpen our chef's knives, and most importantly, make room for the Sunflower Stove. Trust me, your winter fishing will never be the same.
]]>
Choosing the Perfect Fall Trail or Campsite
Location is crucial when planning outdoor activities like hiking, backpacking, or camping. Select hiking paths that are known for their gorgeous autumn foliage. Keep in mind, dogs aren't allowed on every path. You should check that dogs are welcome on the path and that the route meets your dog's physical capabilities before setting off. For instance, the fall foliage in the Cascade Mountain Range is stunning, but the range's steep inclines may be too much for some smaller dogs to handle. Social media groups and websites like AllTrails provide useful information like this.
Gear Preparation
When it comes to embarking on an autumn walk, it is crucial to equip yourself with the necessary gear, particularly if you plan on bringing your canine companion along for the adventure. Here's a checklist of must-haves for your autumn hiking trip with Dog:
For Beginners
Take it easy at first if you're not used to being outside. Take your dog for a day excursion or a camping vacation to observe how she/he does in the great outdoors. Watch out for symptoms of exhaustion, dehydration, or anxiety. Make sure your dog knows how to “stay,” “come,” and “leave it,” as well as other fundamental instructions that are important for both of your safety.
For Experienced
Those who often go hiking or backpacking with their dogs may take advantage of the season's more rough and gorgeous scenarios. You may lighten your burden by refilling your water supply at rivers and streams if you have a portable water filter with you. You should always have a full first aid kit on hand that can be used on both people and dogs. Essentials include tick removing tools, disinfectant wipes, and bandages.
Quick Yes/No Chart for Hiking with Your Dog
Do's (Yes) |
Don'ts (No) |
Check the trail's dog-friendliness |
Overexert your dog |
Keep your dog leashed near wildlife |
Forget to check the weather |
Carry a first aid kit |
Ignore signs of distress in your dog |
Hydrate regularly |
Leave waste behind |
Start early to make the most of daylight |
Hike in the dark |
Pack high-energy snacks for your dog |
Allow your dog to interact with wild animals |
Keep an ID tag on your dog |
Feed your dog unfamiliar foods on the trail |
Plan breaks for your dog's rest |
Let your dog off-leash in unfamiliar areas |
Bring extra layers for cold weather |
Assume every water source is safe |
Test gear before the actual hike |
Disregard trail signs and markers |
Update vaccinations |
Neglect to tell someone about your plans |
Hiking with your dog may be quite fulfilling. You can make sure that you and your furry friend have not only memorable but also delightful trips with the correct preparation, understanding of possible problems, and emphasis on safety. The trip with your dog by your side will be amazing, whether you're hiking through the vivid colors of autumn or the lush green trails of summer.
]]>Ask any backpacker, hiker, or camper, and they'll tell you that the gear they pack can make or break their experience. It's not just about convenience; it's about efficiency, safety, and ensuring that the memories made around a campfire are ones of delight, not discomfort.
Many adventurers often find themselves in the "Aluminum vs Stainless Steel Cookware" debate. While stainless steel has its merits, aluminum, with its lightweight nature and optimal heat distribution, often emerges as the winner for outdoor settings.
Feature | Aluminum Cookware | Stainless Steel Cookware |
---|---|---|
Weight | Lightweight - Ideal for backpacking and trekking | Heavier |
Heat Conductivity | High - Heats up and cools down quickly | Moderate - Takes time to heat and cool |
Durability | Moderate - Can dent or warp if thin | High - Resistant to dents and warping |
Reactivity with Foods | Can react with acidic or alkaline foods, possibly altering flavor | Non-reactive with most foods |
Maintenance and Care | Requires regular cleaning to prevent oxidation | Low maintenance, but can discolor over time |
Cost | Generally less expensive | Can be pricier, depending on the brand |
Crafted with the modern adventurer in mind, this set is a perfect blend of form and function. Here's what makes this set a must-have for anyone serious about their outdoor culinary ventures:
Lightweight & Durable: One of the key benefits of lightweight cookware is reduced strain during long treks. Made from high-quality aluminum, it promises strength without the heft. A boon for those who are conscious about every ounce they carry.
Complete Set: It's not just a single pot or pan. The Fire Maple Set comes equipped with everything you might need, from pots to bowls to spoons, ensuring you won't find yourself lacking in the middle of a meal prep.
Nested Design: Space is a luxury when you're packing for the outdoors. The set's nested design ensures it occupies minimal space, leaving room for other essentials.
Heat-Resistant Handles & Optimal Heat Distribution: No one likes scorched fingers, nor unevenly cooked food. The heat-resistant handles and the optimal heat distribution in cookware made of aluminum ensure that you can cook and serve with ease.
Cultural nuances play a significant role in how we interact with nature. In European and American contexts, backpacking, hiking, and camping are seen not just as leisure activities but as ways to reconnect with oneself and the environment.
For such deep engagements with the outdoors, the gear becomes an extension of the adventurer. The Fire Maple Aluminum Cookware Set, with its combination of durability, design, and efficiency, aligns perfectly with the needs and expectations of these outdoor enthusiasts.
If you're someone who believes that outdoor meals aren't just about sustenance but an integral part of the adventure, then settling for mediocre cookware simply won't do. It's about the aroma of the food merging with the fresh air, the joy of sharing a meal with fellow travelers, and the stories that get cooked up alongside the food.
The Fire Maple Aluminum Cookware Set understands and enhances this experience. It's not just another piece of equipment; it's your culinary companion in the wild.
With the right outdoor cooking gear, every meal becomes an experience, every dish a cherished memory. The Fire Maple Aluminum Cookware Set promises not just efficiency but also moments of joy, laughter, and togetherness. So, the next time the trails beckon, ensure you're packing not just food but the right gear to turn that food into an unforgettable feast.
]]>You might think brewing a delicious cup of coffee is straightforward, even when venturing into the great outdoors, far away from the comforts of a well-equipped kitchen. However, the reality is that this simple task can quickly become a daunting challenge without the necessary coffee gear and knowledge of outdoor coffee-making techniques.
Therefore, its essential to carry the right coffee tools, beans, add-ins, stove, and other gear to make a good cup of coffee. This guide will help you better equip yourself with the right gear and coffee before heading for hiking or camping.
To choose the right gear for hiking and camping, let's first understand the most frequently used coffee-making techniques:
Pouring hot water over freshly ground coffee beans slowly ensures the flavour is thoroughly extracted; it's like a slow cooking technique.
Put the coarse coffee grounds in boiled water for a few minutes, then use the filter to separate the liquid from the coffee leftovers.
Forces highly pressurized hot water through the finely ground coffee, resulting in a concentrated and aromatic shot of espresso.
Now that we have explained some of the standard methods, and probably if you are a coffee lover, you will already be familiar with them. You should invest in coffee equipment according to the coffee method you like most and consider whether you are backpacking or camping since the weight will also be crucial.
In most backpacking cases, you won't be able to carry the big and heavy gear. However, with the advancement in outdoor gear, plenty of lightweight, portable, and durable coffee makers are available that can do the job during camping or hiking.
If you are backpacking or hiking, portable and durable coffee makers are critical, depending on how frequently you use them. French presses, for instance, are popular due to their simplicity, lightweight design, and ability to brew flavourful and robust coffee.
Pour-over system also produces high-quality coffee with less effort. Also, ensure you carry a stove or a portable propane-powered burner along with the kettle.
The Orca Pour Over Coffee Filter from Fire Maple is an excellent choice for backpackers and campers. This is a lightweight and budget-friendly but durable option due to the High-quality stainless steel material, which doesn't rust with extended use. Its compact size makes it highly versatile, as it can be used with various mugs or containers.
You can also buy Orca pour-over coffee kettle and filter set if you don't have a separate kettle.
Different coffee bean types, such as Arabica, Robusta, Liberica, and Excelsa, are available in the market, which vary in taste and flavour. They come from different origins.
Additionally, each type has countless variations to explore, such as Ethiopian Yirgacheffe's floral undertones or Brazilian Santos' nutty aroma. We will not go into much detail about these beans, but it was to give you an idea if you were unaware.
Instant coffee is the go-to choice for many hikers and backpackers. In fact, the majority of them use it due to minimal equipment and preparation effort. Not only do they save time and energy, but they also provide a sufficient caffeine boost during outdoor adventures.
Moreover, with technological advancements and growing demand, many instant coffees now offer premium flavours comparable to freshly brewed cups. However, some of these options are a little expensive compared to fresh coffee beans, but if you value time and effort, then instance coffee is a great option.
We suggest choosing environmentally friendly packaging materials.
Instant coffee packets come in proper water-tight packing that is not only good but also lightweight and compact. However, you need special care if you are taking coffee beans as you might encounter rain or wet weather, which is common in the mountains.
There are different handy and easy ways to store the coffee in your pack. For example, airtight container or vacuum-sealing bags specifically designed for coffee storage is crucial. They will protect the beans or grounds from moisture, oxygen, and light exposure that could result in premature deterioration.
You should also keep the container or pack away from direct sunlight and high temperatures to maintain the flavour of coffee. If grinding is impossible on-site due to weight constraints, pre-ground coffee should be packed in small portions in sealed containers or bags for individual use.
Some people prefer additional add-ins to change the taste and flavour occasionally, so there are plenty of options that vary from person to person. For example, flavoured syrups, such as vanilla or caramel, are good options to add sweetness and different flavour touch to coffee. Some prefer powdered milk as it enhances flavour when adding it to their coffee.
Quality powdered milk guarantees an excellent taste profile, making the coffee experience more enjoyable. Additionally, professional campers appreciate the long shelf life, so taking fresh milk is not feasible.
Another popular choice is powdered hot chocolate mix, which can transform a regular black coffee into a rich mocha delight.
Our collective responsibility is to save nature for the future generation through eco-friendly practices. You cannot just through coffee leftover packets while camping. It is essential to approach the issue with responsibility and environmental consciousness.
One effective method is to reuse the coffee grounds by incorporating them into composting.
It is crucial to ensure the coffee grounds are completely dry before adding them to the compost, as moisture can hinder decomposition and attract pests.
Another option is burying the coffee grounds in small holes around the campsite away from water sources and trails, allowing them to break down naturally over time. Also, use eco-friendly packing, and we thank many companies worldwide who are well aware of this issue and provide eco-friendly packing.
Selecting the proper method of brewing is crucial. Options such as using a percolator or a portable French press can produce excellent results outdoors. Investing in quality coffee beans and properly grinding them before each brew will ensure optimal flavour extraction.
Furthermore, a reliable camping stove and kettle are necessary for any outdoor adventure. Choose a brewing method that suits your preferences and logistics; whether using a pour-over dripper or a lightweight French press, ensure that you have the necessary equipment and knowledge to achieve optimal extraction.
Finally, don't overlook the importance of water quality – opt for filtered or boiled water whenever possible to avoid undesirable flavours from impurities.
]]>Before calculating and carrying stove fuel, it's important to consider your travel needs and the performance of your stove. Take into account the following factors:
Travel Duration and Food Preparation: Determine the number of days you'll be backpacking, the frequency of meals you plan to cook each day, and the type of food you'll be preparing.
Stove Type and Fuel Efficiency: Familiarize yourself with the stove type you'll be using and its corresponding fuel efficiency to select the appropriate fuel and calculate the fuel quantity.
Based on your travel needs and stove performance, follow these steps to calculate the required stove fuel quantity:
Determine Fuel Consumption Rate: Stove often provide information on fuel consumption, such as grams per hour. If specific values are not available, you can estimate the consumption rate based on the stove specifications and user reviews.
Calculate Fuel Consumption per Meal: Using the stove's consumption rate and the cooking time per meal, calculate the amount of fuel required for each meal.
Determine Total Fuel Quantity: Multiply the fuel consumption per meal by the number of meals cooked per day, and then multiply that by the number of travel days to obtain the total fuel quantity.
Example:
Let's say you're planning a 5-day backpacking trip with two meals cooked per day, and each meal takes 20 minutes. You will be using the Fire Maple X2 cooking system, which has a consumption rate of about 158g/h.
When calculating fuel quantity, it's important to consider environmental factors and the need for backup fuel:
Environmental Factors: Cold temperatures and high-altitude locations may result in faster fuel consumption. In such cases, it's recommended to carry extra backup fuel to account for unexpected situations.
Wind Speed: Wind can affect stove combustion efficiency and increase fuel consumption. Opt for stoves with good wind resistance features to minimize fuel waste
By accurately calculating and carrying the appropriate amount of stove fuel, you can ensure your cooking and heating needs are met during your backpacking adventure. Consider your travel requirements, stove performance, environmental factors, and the need for backup fuel when calculating fuel quantity. Remember that specific circumstances may vary based on destination, climate conditions, and individual preferences. Prior to your trip, carefully research and evaluate your stove and fuel options, and adjust the fuel quantity calculations accordingly.
]]>· 2 sausages
· 120g of instant polenta
· 500ml Water
· 1 spoon of Salt
· Toasted bread (optional)
1. Start a fire and let it heat up so you can grill the sausages. You can open the sausages and place them on the hot grill.
2. In the meantime, bring water to a boil in a pot. Add salt to taste.
3. Once the water is boiling, pour the instant polenta into the pot, stirring continuously to avoid lumps.
4. Turn off the heat and continue stirring the polenta until it thickens.
5. Once the sausages are grilled and the polenta is ready, place everything on a plate.
6. If desired, you can serve the dish with toasted bread.
FEAST 4 ALUMINUM COOKWARE
MAVERICK WOOD STOVE
FMS-300T GAS STOVE
WOODPECKER THREE-IN-ONE TITANIUM SPORK
]]>
Improper handling and disposal of gas canisters can lead to accidents and environmental pollution. For instance, gas canisters can explode if exposed to sunlight or open flames, and therefore, it's crucial to dispose of them correctly. FireMaple has taken a proactive approach to tackle this problem by advocating for safe gas canister recycling and highlighting the importance of gas canister safety.
To solve this problem, FireMaple advocates for the recycling and safe use of gas canisters, and calls for more attention and importance to be placed on "gas canister safety and recycling" issues.
Starting from last year, we partnered with campsites to initiate one of our charity projects: gas canister safety recycling station. The design of this recycling station aims to maintain a clean campsite environment and ensure campsite safety. It has a high degree of recognition and is equipped with a special gas canister puncturing tool for handling residual gas inside the canisters.
Although metal gas canisters can degrade in the natural environment, the paint on their surface affects the degradation rate and puts a burden on nature. Breaking the gas canisters with a puncture tool allows rainwater to enter, accelerating the metal's degradation process in nature.
The special nature of gas canisters (containing flammable gas) means they cannot be carried on public transport, which makes it difficult for many campers to dispose of old gas canisters. After puncturing, the gas canisters are no longer a safety hazard and can be transported on public transport for subsequent processing without worry.
Although waste gas canisters with residual gas will not cause serious explosions, even a small amount of chemical reaction from the gas can scare the recycler. Puncturing the gas canisters will completely eliminate this situation.
Guarding the mountains and seas is not an overnight task, it requires the power of "perseverance" and "the masses". Over the years, we have been moving forward little by little, although slowly, but at least we are advancing. This time, let's try to make our voice heard. We believe that one tree will shake another tree, and one cloud will push another cloud. When countless "trees" take root, sprout, and respond to each other on the land we love, some more important changes will happen.
]]>In the world of product management, Larry is a seasoned pro, always juggling the demands of his job and the ever-changing needs of his clients. But even the most experienced managers need a break sometimes, a chance to unplug from the constant stream of emails and phone calls and recharge their batteries.
And what better way to do that than a trip to the great outdoors? Larry and his adventurous team set out to conquer the breathtaking Qingliang Peak in Hangzhou. With the sun on their faces and a spring in their step, they took on the steep climb, ready for anything the mountain could throw their way.
Location: Qingliang Peak
Length: 11 miles
Elevation gain: 5,864 feet
Time: 2 days and 1 night
Equipment: hiking bag, down sleeping bag, sleeping pad, pole-less tent, Fire-Maple 300t stove, Fire-Maple 900ml Titanium pot, some dry food, water, sports drink, first aid kit
The journey begins early in the morning as Larry and his team set out to tackle the challenging hike to the top of the mountain. They packed everything the day before, both food, clothing and shelter, in a light, portable and small package. Larry made sure he had everything he needed to ensure a comfortable and safe backpacking trip.
As they began the hike, Larry and his group quickly realized that it was going to be a challenging one. The trail was steep and rocky, and the vegetation was dense, with bamboo, maple, and oak trees towering overhead. They were constantly navigating narrow paths, steep inclines, and rocky terrain.
Despite the challenges, Larry and his group pushed on, taking in the stunning scenery around them. As they climbed higher, the vegetation changed, giving way to alpine meadows and sparse trees. The meadows were filled with blooming wildflowers, including mountain asters, lilies, and rhododendrons.
After hiking for several hours, Larry finally reached the summit of Qingliang Peak. The summit offered breathtaking views of the surrounding mountains and valleys, with mist shrouding the peaks in the distance. Larry set up camp for the night, enjoying the peace and quiet of the mountain.
In the evening, Larry used Fire-Maple 300t stove and 900ml Titanium pot to prepare a hot meal.
Together, the FMS-300T stove and the 900ml Titanium Pot form a lightweight and compact cooking set that is ideal for backpacking and camping trips. The entire set takes up minimal space in your backpack, making it easy to carry with you on the trail.
The gear performed well, even in the challenging conditions, and provided the necessary nourishment to fuel the group for the rest of the trip.
The trip wasn't without its challenges, though. In the middle of the night, the weather changed suddenly, and strong winds and rain hit the mountain. However, Larry and his group were prepared for the weather, and their equipment held up well throughout the night.
The next morning, after a restful night's sleep, Larry and his group enjoyed a hot breakfast before starting their descent. The journey down was just as challenging as the journey up, with steep inclines and rocky terrain to navigate.
Despite the challenges, Larry's adventure to Qingliang Peak was a success. The trip provided him with the opportunity to test our brand's products in a real-world environment and ensure that they meet the needs of our customers. Our products performed well throughout the trip, and Larry returned to the office with valuable insights into product design and development.
]]>At Firemaple, we believe that every little action counts when it comes to protecting the environment. As we provide best outdoor gears, we are also focused to make the environment clean and best. Our team's mission to clean up the mountains was just one small step towards making a difference, but it's a step that we're proud to have taken. We hope that this blog post has inspired you to think about ways that you can make a positive impact on the world, whether it's by reducing your own waste, participating in a local cleanup effort, or supporting companies that are committed to sustainability. And if you're in the market for outdoor gear that's both high-quality and eco-friendly, be sure to check out Firemaple – we're more than just a brand, we're a community of outdoor enthusiasts who care about the planet we share.
The Cascades are a series of mountains in the northwestern United States. The range is approximately 150 miles long and features both high peaks and deep canyons. The Cascades are home to many endemic plant and animal species, as well as many endemic habitat types. Backpacking trips in the Cascades can be challenging but offer amazing opportunities for outdoor recreation, including hiking, camping, mountaineering, skiing, climbing, and kayaking.
The Rocky Mountains are a massive mountain range that runs east-west across the United States from Arizona to New York. The Rockies occupy most of Colorado, Wyoming, and Montana, as well as parts of Utah and New Mexico. They're incredibly diverse, ranging from snow-capped peaks in the highlands to arid deserts in the southeast corner. There are over 14 million acres of public land within the Rockies National Park alone!
The best way to explore these mountains is by backpacking. Backpacking is a great way to see the wilderness without having to deal with crowds or heavy gear. You can hike short distances (3-5 miles) or long distances (10-25 miles). You can also take day hikes or multi-day trips. Backpacking is a great way to experience different landscapes and meet amazing people!
Smoky Mountains National Park is one of the most popular national parks in the United States. The park spans over 8,000 acres and features a wide variety of terrain, including soaring peaks, lush valleys, and dramatic canyons. There are over 600 miles of hiking trails that wind their way through the park and provide plenty of opportunity to take in its natural beauty.
Some of the most popular trails include the Appalachian Trail, which starts just outside the park boundaries and winds its way past some of the most iconic views in Appalachia; Mount Mitchell State Park’s 5,684-foot summit is home to North America’s highest mountain peak. And for hikers looking for a more challenging trail experience, try exploring Priest Lake or Cosby Campgrounds.
In addition to hiking, Smoky Mountains National Park is also home to several other activities such as fishing, horseback riding, rafting, birdwatching, and photography. So whether you’re looking for a day trip or an extended stay in this gorgeous park, there’s sure to be something for you!
The Pacific Northwest is a region of the United States that stretches from British Columbia in the north to California in the south and from Oregon in the west to Alaska in the east. The region is home to some of America's most spectacular scenery, including mountains, forests, and lakes. There are dozens of memorable backpacking trips available in the Pacific Northwest, ranging from short loops to extensive overnights. Whether you're looking for a challenging wilderness experience or a relaxing weekend getaway, there's something for everyone in the Pacific Northwest.
Some of the best backpacking trails in the Pacific Northwest include:
The Great Lakes are a group of five lakes in North America: Superior, Huron, Michigan, Erie, and Ontario. The lakes are the largest group of freshwater lakes on Earth, containing 20% of the world's freshwater. The total area is 2,160,000 square miles (5,584,000 km2), making them about twice the size of France. They're also home to more than 1 billion people and a variety of wildlife.
The lakes were formed by the last Ice Age about 20,000 years ago. Over time they've been filled with sand and silt brought down by rivers flowing into them from the Appalachian Mountains. Today there are still several small rivers flowing into the lakes, but they're mostly used for irrigation. The biggest river flowing into the lakes is the St. Lawrence River which flows eastward from Canada into Lake Ontario.
There are a number of great backpacking trips you can take in the Great Lakes region:
The Appalachian Trail extends for 2,181 miles from Georgia to Maine and is the longest National Scenic Trail in the United States. It was originally conceived in 1921 as a footpath for hikers and backpackers. The Appalachian Trail Conservancy manages the trail and provides information about the trail, permits, and services.
To hike the entire Appalachian Trail, you would need to purchase a permit for each day you plan to hike, carry enough food and water for your entire journey, and be prepared for extreme weather conditions including blizzards and high altitude sickness. Some of the most scenic sections of the trail are located in North Carolina's Great Smoky Mountains National Park, Tennessee's Grand Canyon National Park, Vermont's Green Mountain National Forest, New Hampshire's White Mountains National Forest, Maine's Mount Katahdin National Monument, and Georgia's Chattahoochee National Forest.
If you're interested in hiking or backpacking on the Appalachian Trail but don't want to commit to an entire journey, some of the best shorter hikes are located near major cities such as Boston, New York City, Philadelphia, Atlanta, Nashville, Chattanooga, Birmingham, and Huntsville.
The Texas Hill Country is one of the most beautiful and rugged areas in the United States. The landscape ranges from rolling hills to sharp peaks, and the weather is always temperate and fair. There are plenty of opportunities for backpacking, hiking, and camping in this area, making it an ideal place for a long-distance hike or camping trip.
Florida Keys National Park is located in southern Florida on the island of Key West. The park is made up of over 900 islands and reefs, with trails that meander through hardwood forests, coastal prairies, mangroves, salt marshes, and coral reefs. The varied topography and ecology makes for incredible backpacking opportunities. Hiking the well-maintained loop trails provides visitors with a rewarding experience that can be enjoyed by all levels of backpackers.
The park features both easy and difficult hikes, so there is definitely something for everyone to enjoy. For the beginner backpacker or those new to hiking, the park offers short walks that are perfect for exploring different parts of the park without getting too tired. Experienced backpackers can take on longer hikes that will challenge their stamina but offer breathtaking views along the way.
Overall, Florida Keys National Park is an incredible place to explore as a backpacking trip. With its diverse environment and easy-to-follow trails, anyone can enjoy a great hike without having any difficulty level concerns!
Zion National Park is an incredible place to hike, bike, or kayak through stunning scenery. The park spans over 2,000 square miles and offers plenty of options for those looking for a challenging backpacking trip. Whether you choose to backpack the entire park or just hit some of its highlights, be sure to pack your patience and good spirits as you journey into this stunning American landscape.
Some of the most popular trails in Zion include the Emerald Pools and Angels Landing trails which traverse through narrow canyons and high-elevation plateaus respectively. For hikers looking for a more moderate challenge, trails such as the Mittens Trail offer scenic views while providing plenty of opportunities for rest and relaxation. Bicyclists will love riding on some of Zion's renowned mountain biking trails such as Angel's Landing or the Bright Angel Trail which wind their way through beautiful canyons and valleys. Kayakers will find plenty to explore on the Clear Lake, Spring Wash, and Red Buttes Lake areas which offer crystal clear waters with a variety of exciting shoreline features to explore.
If you're looking for an epic backpacker adventure, these ten trips in the U.S. are definitely worth considering. Each one is full of stunning scenery and interesting history, making them perfect for anyone who loves outdoor exploration. So if you're itching to get out there on the trail, be sure to add one (or more) of these trips to your list!
]]>Portable gas stoves feature a burner and a cooking surface. Thus, they allow you to quickly boil, sauté, fry, and simmer. As for the competency required to work with them, whatever you can do on a stovetop at home, you can pull off using a portable gas stove.
It is important to note that portable gas stoves differ from your run-of-the-mill portable gas grills. The gas stoves are recommended if you want to make meals other than your conventional barbecue menu.
While some gas stoves come with containers you can use to cook, they can generally work exceptionally well with various pots, skillets, and pans.
This post will talk about factors you should consider when choosing the right portable gas stove and three options you can choose from!
Each person's or group's needs differ on a camping or hiking trip. While some might like to travel in large groups, others prefer solo adventures.
That's why you must be careful when choosing a portable gas stove. Keep the following factors in mind when you're finalizing the portable gas stove, and you'll be good to go:
So, basically, what are you cooking? Will you be using the portable gas stove to boil soup? Do you want to steam vegetables? Are you going to be preparing heavier meals? The use will help you narrow down the list and find the right gas stove for your trips.
If you plan to hike, it is strongly recommended that you keep the weight you'll carry in check. On the other hand, if you plan to set up a base camp, you might consider carrying more gear to allow for ease once you're settled in.
So, the size of the gas stove will depend on the duration and intensity of your trip.
The cost of the portable gas stove is going to be one of the decisive factors. Therefore, you'll find different portable gas stoves in different price categories. However, you also need to factor in the stove's efficiency.
A cheap portable gas stove might cost you more in the long run when it wastes fuel because of its lower efficiency.
On the other hand, a costly portable gas stove will offer durability and thus will require little to no maintenance.
You can easily get by with a single-burner portable gas stove if it's just you or a partner. However, if you are moving as a group, you might want to look for gas stoves that offer multiple burners.
Stoves such as Lotus Titanium Solid Alcohol Stove use solid fuel tablets, alcohol blocks, and wax blocks. However, when it comes to portable gas stoves, you need to pick one based on the fuel you'll be carrying.
Three primary types of liquid fuels are generally used. Each has its pros and cons. The fuel types are mentioned below:
Propane – It is the most commonly used camp stove fuel. It is readily available and delivers high performance.
Isobutane – This particular fuel type is lighter and offers a lower boiling point. Thus, it is easier to carry. Although it is expensive, it actually offers higher efficiency in cold environments.
Butane – This fuel type is very affordable. However, there are certain trade-offs. For instance, it offers the lowest efficiency and reliability. Similarly, it provides the lowest vapor pressure when compared with the other two fuel types and has the highest boiling point.
Before choosing the portable gas stove, you need to be clear about the fuel type you'll use.
The last thing you want is your portable gas stove dying on you when you need it the most. That's why it is important to choose a gas stove that's reliable and crafted using high-grade materials.
We recommend the following three portable gas stoves:
This portable gas stove comes with micro-regulating technology. As a result, it offers more control over heat adjustment. You can also use it for a light simmer and a full boil.
In addition, it can maintain a steady burner output even during different environmental conditions. So you can use it even in harsh temperatures.
Polaris Pressure Regulator Cooking System features a push-button igniter that works even at -6 degrees Celsius. In addition, the gas stove comes with a pot with a Neoprene cover, pot stand, Tritan lid featuring a silicon knob, canister stand, and a mesh bag.
If you're looking for a compact and ultralight portable gas stove that can be used for long-distance backpacking, then Hornet II Titanium Gas Stove is the ideal choice. It offers a 122mm diameter with a non-slip design.
Furthermore, it features a windproof burner top and can provide you with a burner flame. Finally, it can be folded for easy storage.
Although this portable gas stove will take up more space, it offers great reliability. It offers a 2300 W output and can boil one liter of water in about 3'25".
This portable gas stove also features a pressure-sensing mechanism that automatically ejects gas cylinders at high pressure.
In addition, it comes with a magnetic lock system that secures the fuel can and thus removes the possibility of loading the fuel can wrongly. Finally, as an added safety measure, it is delivered with a double seal, thus providing thorough protection against gas leakage.
If you want a stove that doesn't rely on gas but uses solid fuel, you should consider Lotus Titanium Solid Alcohol Stove. It can be used with alcohol blocks, wax blocks, and solid fuel tablets.
It is a great option if you don't want to carry fuel cans with you on your trip. In addition, it comes with an integrated windshield design that enhances its efficiency while reducing fuel wastage.
As you can see, selecting a portable gas stove depends on various factors. So, before you make any purchase, it is important to ask yourself the questions mentioned above to understand your needs better.
You can also reach out to Fire Maple and talk to our experts before making a purchase decision. Do let us know what you think of this post and if there's anything you'd like to add via comments.
]]>
if you're camping in an area with cold temperatures, your normal stove may not be able to provide the heat you need to cook your food. In this condition, you'll want to consider using a stove system. A stove system is made up of several pieces: a heater, a fuel source (either propane or wood), and a cooking vessel. The heater provides the heat needed to cook food, while the fuel source supplies the energy required to boil water or cook food in other ways.
A stove system is practical because it eliminates the need to carry around extra fuel and cooking devices. It also allows you to cook the food easily. Last but not least, using a stove system saves time by eliminating the need for campfire cooking methods that can take hours or even days to complete.
Camping is a great way to get out in nature and experience all of the different aspects of the outdoors. However, if you plan on cooking your meals while camping, you need to make sure that your stove is as efficient as possible. Here are some reasons why your backcountry stove should be a system:
-Efficient Use of Fuel: A backcountry stove is not as powerful as a standard kitchen stove, so you need to be careful with how much fuel you use. A system will automatically adjust the amount of fuel that is being used, reducing the amount of waste that is created.
-No Wasted Heat: When using a standard kitchen stove, all of the heat from the burner goes straight out the front. This means that any food or liquid that’s cooking will also be cooked by the heat from the front burner. With a system, all of the heat from the burners goes into the pot being cooked, meaning there’s less chance of overcooking your food or causing it to burn.
-Easier Cleanup: If something does happen and your food starts burning, cleaning up can be difficult with a standard kitchen stove. With a system, all of the burners are on one side which makes it much easier to clean up. All you have to do is turn off each burner individually and then wipe it down.
One of the best things about owning a backcountry stove is that you'll have more space to cook. Backpacking stoves are typically lighter and smaller than traditional camp kitchen stoves, which makes them perfect for packing into small spaces. Plus, they use less fuel, so you're not wasting precious resources on unnecessary heat.
The components of a stove system are designed to work together as a self-contained unit. All you need to do is attach the pot to the burner head and then put on the lid. If you choose an insulated cozy, it's like finding comfort food in one oversized mug. These stoves are easy to use, convenient for your field trips, and are great for solo and minimalist trips.
If you're camping in a remote location, you'll appreciate the extra durability of a stove. The stove systems are designed to handle the elements and are built to last.
They are built tougher than backpacking stoves because they're used in harsher environments. They're also less likely to break, which means you can rely on them to cook your meals while you're out in the wilderness.
Whether you're an experienced backpacker who has mastered the art of cooking on a open fire or a first-time hiker just getting started, having a reliable and efficient backcountry stove can make all the difference. In this article, we've listed five reasons why your backcountry stove should be considered essential equipment for any adventurer. So whether you're planning to head out into the wilderness soon or just want to improve your cooking skills in general, be sure to check out our list!
]]>You've found the proper location to shop for new camping cookware if you plan on doing any hiking in the near future. The members of our outdoor-expert team have prepared hundreds of meals using dozens of cook sets while hiking routes throughout the globe. We researched and tested extensively the finest hiking cookware available to compile this list. All of our suggestions are made without bias, and it is our hope that our readers will discover items they will enjoy using for years in the great outdoors.
Cooking in the backcountry is a one-of-a-kind adventure. Cooking a delicious meal with your own two hands when surrounded by loved ones or a breath-taking view is an experience unlike any other. But special equipment is needed for such an unusual adventure. Cast-iron skillets are fantastic for the outdoors, but there's no need to bring one along on your hike just to cook some food. You need durable gear that won't break the bank or your back, and it can't take up too much room in your pack.
There are various qualities of backpacking cookware that attracts the adventurous man. Some of the necessary qualities are given as udder
Size and Weight
It is critical to have packaging that is both lightweight and compact. If you have a camping cook set that is both portable and lightweight, you will be able to do more with less effort. On the other hand, this often necessitates sacrificing some capacity, performance, or both.
Capacity
If you are just going to be going out by yourself, it is quite unlikely that you will want to bring along a large pot. On the other hand, if you want to go camping with a large number of people, you could discover that you need more robust cooking equipment. For some individuals, a cup is the only culinary utensil that is required for a certain task. Some people have higher standards for how they should spend their time in the kitchen.
Durability
Even if you had the space and the strength, you couldn't carry your traditional cookware with you on the road since it wasn't made for that kind of lifestyle. It is essential to have the assurance that the contents of your pack will stay unharmed even if they travel through the same terrain as you do.
Efficiency
There is a vast range of quality available in cooking utensils. On the trail, you absolutely need to have a pot that doesn't stick. You are going to need one that warms up really quickly and maintains a constant heat distribution.
Fire Maple is in the race to provide best experience to cook outside. Fire Maple thinks outdoor cooking should be just as straightforward and satisfying as inside cooking. Our camping cookware is affordably priced and thoughtfully crafted to ensure you can always enjoy home-cooked meals, no matter where your adventure takes you.
It offers following products in the outdoor backpacking cookware package
The Antarcti Stainless Steel kettle is constructed out of 18-8 stainless steel that has a thickness of 6 gauge and is appropriate for use with food. Walls that are thicker may retain in more heat and last longer, both of which add to the durability and dependability of a product. This 1.5-liter mug is great for handling beverages such as coffee and tea, as well as meals when camping. Utilizable in undeveloped areas or during times of disaster to purify and make drinking water suitable for consumption. This pot is made entirely of stainless steel, so it may be used on camp stoves, in fireplaces, and even over open flames without any risk of corrosion. When moving and handling hot cooking equipment, use extreme caution.
Antarcti Stainless Steel Kettle & Lid and Protective Mesh Bag are also part of the package.
When you're out trekking, camping, or bushcrafting, you'll want to bring along a reliable and lightweight pot like the Fire Maple Antarcti 1.2L Stainless Steel pot. It's perfect for making steamed meals, brewing tea and coffee, and quickly heating water for these uses. Its compact dimensions and 1.2 litre capacity make it an excellent addition to any survival pack or for use on solo or small group adventures. The adaptability of the steamer's nesting feature allows for new culinary adventures, such as cooking in the great outdoors.
We have faith that the suggestions and sources we provide are reliable. To get the finest evaluations possible, we "pound the pavement" relentlessly. That means we prepare a vast array of meals using our camping gear. Each member of our testing team performs this as part of their personal and professional life.
]]>When you go on a camping vacation and prepare your own meals, not only can you save a tonne of money but you can also receive precisely the nutrition you need while having a good time doing it.
A little ingenuity, some forethought, and the proper equipment are all that are required for a successful camping meal. At the very least, you should carry along some basic equipment and a simple, dependable camp cooking setup. Some recipes for best experience by using feast 4 camp cook set are given as under
This quick and easy hot breakfast requires no cooking, just the addition of water, and will have you out the door in no time. Put the components in a bag and mix them at home. After you've boiled some water, all you have to do to prepare your trail food is adding it to the boiling water. This is satiating and protein-rich thanks to the combination of dry oats and trail mix.
Put some oats, trail mix, cinnamon, and brown sugar in a Stasher bag and mix it all together at home. The ingredients may be rehydrated by boiling one cup of water and adding them while on the path. Bring to a boil and keep it there for 5-10 minutes, depending on how thick you want it. Immediately serve.
So that hikers don't feel deprived of their daily dose of fresh vegetables, this soup is made with a traditional foundation of onions, celery, and carrots. If you use bouillon instead of chicken stock, you won't have to worry about carrying as much extra weight and can instead bring along some excellent, fresh cheese tortellini.
The butter may be melted in a pot over low to medium heat. Sauté the carrots, celery, and onion until they are tender. Put in 4 c of water and put the stove on high so it can come to a boil. Once the water has come to a boil, add the chicken bouillon and mix well. Once the water has returned to a boil, add the pasta and reduce the heat to medium-high. Pasta should be cooked for the amount of time specified on the box. Reduce the heat, throw in the spinach, and swirl it around until it wilts. Pepper and grated Parmesan cheese should be added before serving.
Microwaveable fried rice, precooked chicken, and dried vegetables are just a few examples of trail-friendly meals that can be cooked quickly and easily while on the run. Save time and space without sacrificing the delicious taste profile that makes fried rice so popular.
Olive oil, about 1 to 2 tablespoons. Stir in the rice, and brown it for three to five minutes. Dig a hole in the middle. To boil an egg, just crack it into the well. When the rice is done, include the egg. Include 1 cup of dry vegetable mix, 1 can or packet of pre-cooked chicken breast, and 1 box of stir fry sauce. To rehydrate, stir and let aside for some time. Cook the vegetables in the water until they are tender, about a quarter cup.
This upside-down cobbler is an easy, fun treat. Simply combine all of your cobbler ingredients, then top with your desired fruit and cook! You may make life much simpler by pre-mixing your dry ingredients (such as sugar, flower, baking powder, and cinnamon) in a bag.
Put butter in a saucepan and heat it until it melts. Pour the mixture over the butter, which has already been topped with the fruit. Scatter fruit over the top of the batter in the baking dish. Cover and bake in a low oven for 15–20 minutes. When the top is just dry, the cobbler is ready.
You should look for a camping stove that allows you to control the amount of flame that is produced so that you do not accidentally burn your meals.
For the one-pot cooking method, I find that a regular spoon-shaped utensil works better than a spork, and here's why: a flat spoon shape enables you to scrape all the food bits out of your pot without damaging it, which makes washing your pot a lot easier. A spork, on the other hand, has a pointed end that allows you to poke holes in the food.
When you go camping in the woods, you will inevitably run into the necessity to boil some water at some time. A camping kettle made of stainless steel is an essential piece of culinary equipment that can be used for a variety of tasks, including brewing tea, cleaning dishes, and preparing pot noodles.
Having the Feast 4 Camp Cook Set with you will turn camping into a fun and relaxing part of your routine.
For outdoor gatherings with three to four people, choose the Feast 4 cook set. Excellent heat conduction and less likelihood of food sticking are two of the many benefits of using a hard anodized aluminium cooking surface. It's perfect for camping in a vehicle, but it's also lightweight and small enough to bring on a long hiking trip. Compatible with Fire-Maple stoves and other cooking systems that have a pot support stand.
Feast 4 Camp Cook Set contain following equipment in the package
The valve on the range is home to an essential component of the pressure regulator that controls the appliance. As its name indicates, this knob controls the amount of fuel pressure that is introduced into the stove's jet. The pressure levels for which the remote gas stove systems manufactured by Polaris are optimised are those which are maintained by the regulator regardless of the effects of the surrounding environment.
Engineers designed both the reactor and the burner so that they could operate most effectively at lower pressures. This is done so that the stove can keep producing the ideal amount of heat (at its optimum) for as long as possible, even after the pressure has fallen below it. The pressure regulator on the range ensures that the fuel pressure is kept at the appropriate level at all times.
Sadly, a pressure regulator is a feature that is not often seen in backpacking stoves. A drop in heat output is brought about by a loss in fuel pressure. A regulated stove, on the other hand, will keep producing the same amount of heat even if the pressure in the canister drops, but the performance of an uncontrolled stove would worsen.
The temperature at which an unmanaged stove produces its greatest amount of heat is somewhere in the neighbourhood of 70 degrees Fahrenheit. At this time, there is a pressure of 45 pounds per square inch (psi) inside of the canister. When the pressure within the canister falls to 30 pounds per square inch, it indicates that the interior temperature has dropped to 50 degrees Fahrenheit or below (psi). While you are using your burner, you should have no trouble bringing the temperature of your canister down to 40 degrees Fahrenheit and lowering the pressure to 22 pounds. In point of fact, on that brisk morning in the fall, your stove could be generating just little more than sixty percent of its stated output.
In contrast, remote gas stoves from Polaris equipped with a pressure regulator are optimised for operation at 15 pounds per square inch (psi), and the regulator guarantees that the stove will never receive more than that amount of pressure (until it finally drops below 15).
You won't notice a decrease in performance until either your canister is almost depleted or the temperature falls below the limit of the pressure regulator. Until then, the canister will continue to function normally. This means that your fourth pot of water will boil just as quickly as your first pot with a stove that has been properly controlled, and you will be able to continue to enjoy the stove's superb performance in a far broader range of environmental conditions.
Because to an internal pressure regulator in the reactor, the functionality of its butane and propane canisters is improved when used in cold weather. This regulator guarantees a consistent flow of gas to the burner at all times, regardless of whether the canister is cold or almost empty. Despite this, its powers are restricted. Depending on how you handle the canisters and if you are cooking in a suitably protected area like a tent vestibule or out in the open, the Reactor is most effective when used at temps in the low teen range. Around an elevation of 10,000 feet, the Reactor will continue to operate, but at a level of efficiency that is inferior to that of a stove that uses liquid fuel.
Why to use pressure regulator
The stoves often used by backpackers do not have pressure regulators. For this reason, their effectiveness decreases as the pressure in their canisters decreases. A stove with a regulator, on the other hand, may continue to function normally despite the canister's pressure decreasing, since the regulator keeps the stove's internal pressure at an optimum level. You get instant boiling water no matter what happens to the canister.
In other words, the regulator ensures that your stove continues to operate at maximum efficiency in a broader variety of settings and scenarios, from very hot to extremely cold weather, from a full to an empty canister, and everywhere in between.
As a result, your stove will continue to function normally even when the canister is almost empty. It's a money- and gas-saver. A pressure regulator improves your stove's efficiency, so you can use less fuel while cooking.
Working of Fire Maple pressure-regulator
Pressure regulator have the following components
With the valve open, gas travels via Pass B and into Cabin C. C cabin's pressure is regulated via movable panels that compress the space when the pressure drops and expand it when it rises.
When the gas cartridge's internal pressure rises too quickly, the stove will shut off. This might happen if the cartridge is exposed to direct sunlight or is improperly positioned near a heat source. As a result, the pressure-regulator may also serve as a safety mechanism.
The Polaris should only be used with regular threaded camping gas canisters of the same size and type due to the construction of the pressure regulator. When used with an adaptor, performance suffers. Propane tanks with a big thread size, 1-pound bottles, etc.
Polaris Pressure-regulator remote Gas Stove
One of our most cutting-edge camping stoves, it excels in high-altitude, windy environments. The inbuilt pressure regulator keeps the burner's flame steady and powerful despite the decreased gas pressure from the canister in these extreme cold temperatures.
It is best to choose due to following reasons
However, since backcountry camping is quite different from glamping (glamorous camping), it is important to clearly understand the basics. This post will discuss that and help educate your inner adventurer so that you can properly enjoy backcountry camping.
Backcountry camping also referred to as primitive camping, involves camping in isolation from other campers. You don’t reserve any campsites or enjoy access to amenities (thus, the name, primitive camping).
Basically, you will be on your own in the wilderness of Mother Nature. That may sound scary, but if you prepare correctly, it can be one of the best adventures you can enjoy.
To fully enjoy and succeed at it, you must ensure that you have the required supplies for your trip.
Keep the following things in mind for your primitive camping trip:
Primitive camping is much more affordable than car camping or glamping. However, you might have to get permits and pay fees to ensure a hassle-free excursion.
You can start by learning if you’re allowed backcountry camping in the target area. However, you will also have to pay the fees that are required. For instance, fishing generally requires permits. So, you must obtain the proper license before you go ahead fishing in the backcountry waters.
A GPS is a must-have for primitive camping. It is going to be one of the most-used and crucial tools in your camping gear.
You should know how to figure out where you are and how to get back to the starting point. Furthermore, it will help you to avoid any dangerous spots on the way. We recommend using a compass and a map since they don’t require cellular service or a battery.
Your backcountry camping gear can make or break your entire trip. Therefore, it is strongly recommended that you compile a list of items required, organize them accordingly, and optimally pack them.
Since you won’t be traveling in a car, it is crucial that you objectively think about the items that you’ll need and how you’ll be carrying them to the destination.
When you’re primitive camping, there’s no guarantee of what kind of weather you’ll be facing.
That’s why experts suggest you bring extra items apart from the standard essentials. The same applies to sleeping gear too. You should have sleeping bags, sleeping pads, space, and wool blankets to ensure you can enjoy a sound sleep.
You should carry a first aid kit and the basic knowledge of administering first aid. For example, you might have to attend to sprains, bites, cuts, and such. Therefore, you must know how to treat these and other common injuries.
You should be able to clean wounds and must have an exit strategy if you become seriously injured.
You must keep optimal clothing with you. In addition, you should have clothing options to mitigate any unexpected conditions you might face.
Consider keeping extra undershirts, wool socks, underwear, etc., to avoid any undesirable situation. For example, if you get caught in a blizzard, the extra clothing may serve as a lifesaver.
You will need a proper shelter during your backcountry camping to ensure that you remain safe and have adequate protection from the elements. You can choose a backpacking tent since they are lightweight and offer great functionality and maximum space.
You can also use a tarp for shelter purposes. It can also assist you in various situations; for instance, it can block the wind when trying to cook.
Getting clean water when you’re primitive camping can be challenging. That’s why you should always ensure more than an adequate clean water supply.
You can use water bladders instead of water bottles to reduce the extra weight. Furthermore, you can also carry water filters that would allow you to drink water available at the camping area. However, prior diligence will be needed to know whether you’ll be close to a water body.
You’ll be cooking your food during primitive camping. So, it is vital that you bring an optimal portable gas stove with you. For instance, you can bring Hornet II Titanium Gas Stove!
Not only is it lightweight, but it is also quite durable. In addition, it offers a windproof burner too. Of course, if you don’t want to carry fuel cans, you can always try Lotus Titanium Solid Alcohol Stove, which requires solid fuel tablets.
Apart from a portable gas stove, you should also invest in prepared meals that only require to be heated in boiling water. You should plan your meals according to the days you’ll be backcountry camping.
During primitive camping, you won’t have access to your vehicle. So, while the whole purpose is to disconnect and find peace, it is crucial to let someone know where you will be and the areas you’ll be exploring. In addition, you should also let them know by when you will be back.
This is a safety precaution because if you aren’t back by the specified time, someone can inform authorities to ensure that you get the proper help if need be.
As for the safety gear, you should carry air horns, blinking headlamps, whistles, and similar items to keep yourself safe from any danger.
In a nutshell, it is essential to cover all bases when you’re planning a primitive camping trip. While peaceful, nature can be pretty daunting, and unless you’re properly prepared, you might find yourself in harsh waters.
So, do the necessary homework before you head out for your backcountry camping trip. By carrying proper gear and being adequately prepared, you will end up having a great time on your trip and remain safe!
]]>
When it comes to packing your food for backpacking, there are a few things to keep in mind.
The first is that you should always pack as much variety as possible. This means packing foods that can be eaten raw, cooked over a fire, or frozen and thawed on the trail.
Another thing to keep in mind is how much weight your food can carry. Some lightweight options include dehydrated meals and pre-packaged food items like trail mix bars or energy bars. However, these options can also be expensive and May not contain all the nutrients someone may need on the trail.
If money is no object, then foods like hearty breakfasts or dinners can be packed with plenty of calories and fiber to provide lasting energy throughout the day.
Ultimately, it's important to weigh your options and decide what will work best for you on your particular hike.
When packing for a backpacking trip, it's important to think about what you will need to sustain yourself on the trail. This includes food, water, and equipment. Below are some smart ideas for packing food for a backpacking trip.
One thing not to forget is sunscreen! Ultraviolet (UV) rays from the sun can damage your skin while hiking in summertime even if you're wearing sunscreen applied before
If you're like most backpackers, you enjoy cooking your own food while on the trail. Backpacking food can be as simple or complex as you want it to be. Here are some tips for making delicious and healthy backpacking food:
1) Find a source of fresh water. This is essential for cooking and drinking, so make sure to always carries enough with you.
2) Pack a portable stove. Stoves come in all shapes and sizes, so find one that will fit into your gear list and pack size. Depending on the type of stove you choose, you may need fuel (propane, charcoal, wood), pots and pans, utensils, and a fire starter such as lighter fluid or matches.
3) Choose foods that will travel well. When packing your backpack, try to pack foods that can withstand both high heat and humidity (such as chili). And don't forget the condiments! For example, bring packets of ketchup or hot sauce with you to add flavor to your meals without adding extra calories or weight to your pack.
4) Plan your meals ahead of time. This way, you won't have to waste time rummaging through your backpack in search of something to cook when hunger strikes. Use meal planning software or an app to help plan out your meals ahead of time based on caloric requirements and preferences.
5) Avoid heavy items that will slow you down. When packing your backpack, try to pack as light as possible while still ensuring that your food will stay hot or cold. This means avoiding bulky groceries and cooking equipment and instead packing small containers or packs of food that you can easily access.
6) Make campfire cooking a breeze. Whether you're using a stove or an open fire, preparing your meals around the campfire can be a fun and easy way to spend your downtime. Just be sure to have all the necessary supplies, including kindling, logs, pots and pans, and spices.
7) Enjoy your outdoorsy cuisine! When cooking on the trail, don't forget to savor the moment and take in all the natural beauty around you. After all, what better way to turn a day of hiking into a memorable experience than by enjoying some delicious home-cooked food?
Whether you're hitting the trails for a weekend hike or planning a month-long trip, packing your own food is key to maximizing your time outdoors. Here are thirteen smart food ideas for backpacking trips that will not only keep you nourished but also save you money.
These food ideas for backpacking trips will help you stay energized and satisfied on your next outdoor adventure.
Backpacking is an amazing way to explore new places and get a true taste of the local culture. However, it's also hard work carrying all of your food with you on your trip. This list of 13 food ideas will help you pack light and still enjoy great meals while backpacking. From easy-to-make snacks to hearty entrees, these recipes are sure to please even the most picky backpacker.
]]>When planning your backpacking trip, it's important to remember that you will need a permit and access to certain areas in order to enjoy the park. Here is a comprehensive list of what you'll need in order to backpack in any national park:
Permits
Each place has different restrictions and guidelines for accessing specific areas, so be sure to read the Accessibility Information before arrival. This information will tell you everything from which trails are open to conditions for rafting or climbing. Always take note of these restrictions in case of anything changes while you're away!
If you're planning a backpacking trip, there are a few things you'll need before packing your bags:
Here's a checklist of the most important items for any backpacking trip:
When packing for a backpacking trip, it is important to pack the right clothing and footwear. Here are some recommended items:
When planning your backpacking trip, it is important to remember that food and water are essential for survival. Make sure to pack enough food and drink to last the length of your trip, and be prepared for any weather conditions that may arise.
Here are some food and water items you should always pack when backpacking:
Be sure to pack the pack these items:
One of the most important things when packing for a backpacking trip is ensuring you have access to maps and navigation. A good way to ensure you always have access to maps is by carrying a GPS unit or mapping app on your phone. A map or guide is essential for finding your way around unfamiliar territory. Make sure to bring both a topographical map and detailed directions for trails and checkpoints along the way.
Backpacking is a great way to explore new places and meet new people, but it can also be dangerous if you don't take the necessary precautions. This checklist will help ensure that you are prepared for any medical or first aid needs that may arise along your backpacking journey.
Be sure to pack plenty of medication and supplies for minor wounds and insect bites. Include bandages, antiseptics, antibacterial ointment, sterile wipes, creams, and plasters. In case of an emergency, know how to use basic first aid supplies like oxygen masks and tourniquets.
Always consult a doctor before backpacking if you have any pre-existing health conditions. And if something goes wrong while you're out in the wild, know how to get help. Carry phone numbers for local hospitals and rescue teams on hand in case of an emergency.
While packing your backpack you should also include emergency and signaling kit which consists of:
Games and entertainment can be a huge part of any trip, whether you’re on an all-inclusive resort or backpacking the world. Here are some games and entertainments that will make your travels more enjoyable:
When packing for a backpacking trip, it's important to think about the specific needs of your trip. For instance, if you'll be hiking in mountainous terrain or spending a lot of time on the river, you'll need different gear than someone who is traveling through dense forest.
Here are some key things to pack for a backpacking trip:
There is no one-size-fits-all answer to this question, as the amount of gear a backpacker needs will vary depending on the length and type of trip they are taking. However, here are some general tips to help you pack efficiently for backpacking trips:
When packing for a backpacking trip, it is important to consider the climate and terrain you will be visiting. Not everything you may think of packing is necessary. Here are some things not to pack for a backpacking trip:
There are a few things to keep in mind when packing for a backpacking trip. First and foremost, take into account the weight of your items. Make sure your backpack is able to carry all the gear you plan on taking with you, without feeling too heavy or cumbersome. Second, make sure to pack enough snacks and water so that you don't have to stop frequently during your hike. And lastly, be sure to pack some emergency supplies should something happen along the way. Here are some tips for packing a backpack for your next hiking trip:
If you're planning a backpacking trip, it's important to be prepared for anything. That means packing the right gear and making sure you have enough food and water supplies. In this article, we have showed you how to pack a backpack for backpacking trips, including what to bring and what to leave behind. Be sure to read through our tips carefully before your next big hike!
]]>1.Navigation and Route
The extra double-checking in a group setting is always necessary when confronted with multiple paths. When you're all by yourself, you don't have time to do that.
So make sure that all of your maps, whether they're on paper or on your phone, are up to date and accurate before setting out. I think a paper map and compass would be helpful in our discussion of redundancy.
The destination does not have to be new; it can be a place you've been before. Being on your own for the first time is sometimes nerve-wracking, so it's ideal to go to a familiar place.
PS: Keep at least one person informed on where you are and what you plans for the next coming days.
2.Be Prepared
a. Look up the Weather, the temperature and the climate. Determine in advance whether you need to pack a rain gear, a hat, extra tools for storing water, a pairs of grippy shoes, etc., based on the predicted weather at your destination.
b. Wildlife
You need to know what to do if a bear, snake, mountain lion, or other wild animal appears on the road and how to behave if one of these animals attacks you.
3.Absolutely Know Your Gear
It is crucial to run through a home test of your backpacking gear before a solo trip.
When you're on your own in the wilderness, your only reliable resource is yourself and your backpack. Make sure you have good equipment and that you know how to use it before you set out.
There's nothing worse than being in the middle of nowhere when you discover your tent has a hole or your stove isn't gassing out.
4.Bring Your Comfort Items
The hardest part of going alone is probably the loneliness you feel at night
To pass the time, bring a few novels, paint sets, or movies, or whatever else will help you relax and sleep.
But don't sleep with earplugs in; you need to be aware of your surroundings at all times.
When we go backpacking, it's almost inevitable that we'll have to pass through some unpleasant or dangerous environments. I believe that the mental and physical strength we develop by overcoming these challenges on our own is invaluable.
Start your first solo hike when you feel comfortable doing so.
Before you go on your adventure, you should inspect the condition of your equipment. Everything from your bicycle to your bikepacking cookware and GPS equipment is covered.
Make sure the tires are in good condition. Apply new sealant to tubeless bikes, ensure the chain is not worn, shifting is smooth, there are no strange noises, and the brake pads are new.
You have to agree that food supplies are critical in any outdoor activity. As a result, instead of bringing anything completely new, bring your familiar, ultralight, compact cooking equipment.
If this is your first bike packing trip, it's likely to be your first time riding a fully loaded bike. You don't want your bike to feel like a tanker, you don't need that much stuff.
By the way, spread the weight of your stuff to minimize the stress on the handlebars and your back. Put on a frame and a seat bag! This will assist to keep your bike's natural handling.
Also, if you have more than one person on the ride and will be staying together, you may share certain items with each other.
Although finding new places is fascinating, such as that chocolate you've never eaten before that may surprise you. However, if you go without planning, you risk being stranded and squandering your energy.
You must be aware with the geography of the route you intend to take, the temperature, the terrain, where there is a reliable water supply, a broad idea of where you will stay, how much food to bring, and any other information that comes to mind. The more you plan, the less likely it is that you will encounter problems.
Some of your fellow may be faster than you. However, whether you're hiking, climbing, or riding a bike, you should always listen to your body. We don't have to rush as much as other companies do.
After all, every journey will come to an end! Don't forget to take in the landscape while you put in the miles.
You may put a real-time monitor on your phone or a GPS gadget that links to your phone so that your loved ones know where you are at all times. It might be difficult to receive aid or even be rescued if no one knows where you've gone or when you're meant to return.
Here are some mouthwatering food options that you must give a try and have a perfectly healthy meal as you travel:
You will never find a person claiming that they do not like sandwiches. Everyone has different recipes and preferences when it comes to sandwich preparation, but the delight it brings to everyone is equal. Preparing a sandwich during a road trip is easy if you come prepared from home.
Just pack some cheese slices, a sauce that you would like to add, cooked patty or whatever you want and chopped vegies if you like any. Reheat the patty in an Antarcti 8" Frypan, assemble the sandwich as per your choice and enjoy your meal. If you have ever been to a cooking summer camp, making a sandwich would have been an activity to remember.
When we plan to cook during a road trip, we look for ease. Choosing to take along hygienic and easy-to-take food items is our goal. Like sandwiches, wraps are amazing items to elevate your meals. You just need some cooked Turkey or chicken for filling, tortilla, and sliced cheese. You can quickly prepare the wrap and enjoy a complete meal for your dinner and lunch. You can use your Antarcti 8" Frypan to heat the wrap once you are done assembling it.
If you are heading for a short trip and want to prepare meals ahead of it, pasta salads are a great option for you. Add either your favourite canned vegies or chop the fresh ones, couple it with an Italian dressing or add other ingredients of your choice. Store it in an air-tight container, and you are good to go.
Browsing for camping food no cooking options? Greek chicken has to be on your takeaway list. Grill the marinated chicken that you have cut in the form of strips. Pack along some fresh vegetables such as onions, tomatoes, cucumber etc., as siders and serve it with naan or tortilla. For enhanced taste, do not forget to reheat the chicken in an Antarcti 1.2L stainless steel pot.
Snacks are the go-to option for your trip if you are not looking for food to cook while camping or a road trip. Chips, biscuits or cupcakes are to name a few. Alternatively you can simply take along some fresh fruits and prepare yourself a bowl, or add yoghurt to it for lunch. Dry cereal, dry fruits or popcorns can also make your meals interesting while you enjoy the wilderness of nature around you.
Healthy food items are essential to make your trip more fun and exciting. The more energy you get, the more likely you are to explore new places. Be wise with your meal choices because travelling occasionally takes a toll on your stomach. Better to avoid things that can cause bloating or nausea. Eat healthily!
]]>Backpacking stove fuel comes in five types: canscanister, liquid fuel, alcohol, wood burning, and solid tablets. The latter 3 options are also known as alternative fuels. The focus today will be on cans and liquid fuels.
Canister Gas stoves
Gas stoves are increasingly popular nowadays since they are more convenient and easy to operate. They are sometimes even lighter than liquid fuel stoves.
The fuel canister is pre-filled with an isobutane/propane pressurized combination. Simply screw the canister onto the burner, open the valve, and light the burner.
Unfortunately, at freezing conditions, isobutane ceases vaporizing, and canister burners struggle to maintain pressure at altitude. As a result, if it's really cold outdoors, they're not as user-friendly as a liquid stove.
Integrated vs. Non-Integrated Canister Stoves
The next step is choosing between an integrated and non-integrated canister stove.
With their compact and thoughtful designs, integrated stoves are unquestionably the most efficient versions. Therefore, they have the quickest boiling times of any stove type on the market by a wide margin. If you choose an integrated stove, you'll need to consider its ability to simmer, to match other cookware. And yes, of course, its weight.
Polaris Pressure Regulator Cooking System is the owner of
the revolutionary micro regulating technology of FireMaple allows for progressive heat changes from moderate simmer to full boil, making it suitable for stir-frying, simmering sauces, and other applications. If you choose an integrated stove, you'll need to consider its ability to simmer, to match other cookware. And yes, of course, its weight.
All of Fire Maple's X-Series cooking systems are excellent options.
The Polaris system, on the other hand, is recommended for usage in severely cold climates.
Liquid fuel
We know liquid fuel stoves need a fuel bottle and they commonly burn white gas, which is a highly refined, clean and hot burning fuel.
In colder regions or at higher elevations, liquid fuel stoves frequently function well. If you intend to travel often in the cold or live in the mountains, this is the great decision for you.
A huge jug of fuel is also convenient since you can refill your bottle whenever you need to. Keeping track of how much fuel you have left in your bottle is simple, and it's also more environmentally friendly since you won't have to purchase new canisters as often.
In comparison to a canister stove, they're a headache to get going. Once they've been primed, they're a touch tricky to get started and may be a little difficult to deal with.
If you just need to boil water for freeze-dried meals, a canister burner with a high heat output, such as the FireMaple Buzz stove, is ideal.
If you want to prepare various meals, you should seek for a stove with simmering capabilities. That implies you'll need a controlled stove or a stove with a variable flame.
Another important consideration is the diversity of camping stoves, which come in a wide range of sizes and designs.
Consider the length of your trips and how much room you have to work with when it comes to deciding how much space and weight to carry.
FMS-116T, which weighs 1.7oz and has an impressive output capacity, is an excellent choice for this purpose.
As a beginner backpacker, I advocate using a canister stove since they're simple, easy to use, and unlikely to be used in temperatures below freezing, so you don't have to worry about that.
]]>Backpacking recipes does not need to be complicated. In fact, they are so simple to make that all you need to do is weigh and prepare the ingredients at home beforehand. One thing to keep in mind: prioritize what you eat based on the freshness of the ingredients as well as the weight, and when you eat can help you lose weight at the end of the trip.
Here are 4 great backpacking recipes that you can easily do. Give your body energy and nutritional value after a long day of hiking.
1. Precooked chicken + instant rice + dried broccoli + olive oil + soy sauce
2. refried beans + instant macaroni + cheddar cheese + chili powder
3. Bacon bits + mashed potatoes + egg powder
4. Tortilla + tomato sauce + cheese + pepperoni
Pack light - wear light. Your clothing should be light and breathable. Waterproofs aren't heavy, so don't neglect to bring some! Clothing like jeans is going to be uncomfortable to wear and heavy as heck to carry. Try to wear lightweight hiking pants, like stretch cargo trousers.
If you are backpacking in a group ensure you are walking at a pace comfortable to the slowest person. This even applies to groups of one! Don't push yourself to walk faster than is comfortable for you, hiking is most certainly a marathon, not a sprint.
Bringing some high-quality hiking cookware or backpacking stoves with you can be a lifesaver - really! Whether you are using it to cook your dinner or purify your water, cookware can be the difference between going to bed hungry or not. Cookware or backpacking stoves don't have to be heavy, there are plenty of options for lightweight compact cookware, you don't have to pack a cast iron pan for the trail.
Backpacking can be dangerous. If you don't take care to stick to the trail you WILL get lost and it's a hell of a hard job to find someone when you don't know where to start looking. Always inform someone of where and when you will be hiking. Tell them which trail you'll be on and then stick to it. It's okay to deviate from the path a little, like when you're taking a break or camping, just don't wander too far
Don't litter, don't disturb the wildlife more than you need to, and don't leave fires unattended. These three key points are what this rule boils down to. When we enter the great outdoors the responsibility is on us as individuals to maintain the tranquillity and balance that we are entering. If you make a concerted effort to clean up after yourself, do as little damage to the plant life as possible, and leave the animals well enough alone you'll do alright. Anything that comes onto the trail with you should leave with you. It's easy to remember to bring your backpacking stove with you. Its a little harder to ensure every candy bar wrapper is accounted for when you return home.
It's a critical option to choose when choosing outdoor camp cookware since it needs to balance price, durability, and weight.
If you already have cookware, whether it was borrowed or given to you, that's a good place to start until you learn and figure out what your needs are. We're going to show you the distinctions between the different metals today.
What materials are these cook pots constructed of? And what kinds of adventures would benefit the most from their features?
But, in the end, if you're more comfortable with something particular, familiarity takes precedence over anything else.
So, let's discuss the three most significant aspects to consider: price, durability, and weight.
While stainless steel is affordable and long-lasting, it is heavier than the other materials.
Aluminum is inexpensive and lightweight, but it is not particularly durable.
Titanium is both strong and light, but it is also rather costly.
For those on a budget who want something simple to cook with, price is key. Stainless steel and aluminum both work nicely here, although aluminum is probably the cheaper option.
Titanium is twice as expensive as steel or aluminum. Every ounce counts while you're hiking, especially if you're going ultralight. Titanium is the lightest of the three.
Here is an overview of each material's average weight.
Aluminum has a density of 2.7 g/m3, titanium has a density of 4.54 g/m3, and stainless steel has a density of 7.7–8 g/m3. It depends on the steel utilized.
Aluminum is by far the lightest material, with titanium being 68% heavier. However, less titanium might be utilized while still preserving strength. Even with titanium, the overall weight is reduced. Stainless steel is the worst choice. It weighs at least 185% more than aluminum. Three times the weight.
For some people, the most important consideration is how long their equipment will last, and how hard they can abuse it without it breaking down.
In terms of damage and scratch resistance, stainless steel is undoubtedly the hardest upon the three, although aluminum is very flexible and easily deformed.
If you're always cooking over an open fire or directly on the coals, the ability to withstand high temperatures is critical.
The melting point of each metal is listed below. Aluminum melts at 660 °C (1,227 °F), stainless steel at 1,375 °C (2,500 °F) to 1.530 °C (2,785 °F), and titanium at 1,668 °C (3,034 °F). A typical campfire may reach almost 500 °C (930 °F) in, and under the correct circumstances, it can reach much higher temperatures. It's close to the melting point of aluminum. Aside from aluminum, steel and titanium are perfectly safe to use in direct contact with fires, however aluminum should be used with extreme caution. Heat warping is quite common, and if your fire is intense enough, your cookware can even melt it.
Another aspect that may influence your choice of cookware is heat conduction. How well does your cookware heat up?
Aluminum and titanium are excellent heat conductors, while stainless steel is not. This is particularly important if you're cooking with a limited resource, such as gas canisters, since heating meals or boiling water in a steel pot would take far longer. There is also the issue of time when compared to aluminum or titanium. Heat conduction is essential if you're on a high-speed, low-drag tour when every minute of rest counts.
Aluminum is ideal for small hiking trips or casual camping.
Our High Efficiency Tea Kettle / Coffee Pot's heat exchanger design lowers wind interference and retains heat to shorten boil times by up to 30%.
Stainless steel is ideal for canoeing, kayaking, and other expeditions where weight isn't an issue
The Antarcti Stainless Steel Cook Pot is ideal for sterilizing water for backcountry and emergency use. Use with open campfires, camp stoves, and fireplaces.
If you're going on a long-distance hiking trip or need something trustworthy, light titanium is the best choice.
You don't have to be troubled by analytical paralysis. The most important thing is anything that gets you outside and having fun.
]]>